User manual and frequently asked questions DELIGHT PRECISION
Simply golden, crispy and healthy*
Thanks to its 3D Air Pulse technology, Fry delight Precision healthy fryer can cook crispy and tasty fried food with little to no oil*. Not only can it fry, it can also grill, roast and bake all your favorite meals with perfect results in no time. Ideal for daily use, Fry delight Precision ensures a healthy, rapid and easy cooking for the whole family. In addition, a baking mould is included in pack.
• From the home page of your appliance, go to "Settings" and select "Connectivity and Account". • Download the app on your smartphone from the Google Play store or the App Store. • From the app, create an account or log in to an existing account then add the product you own. • Follow the different steps displayed successively on the product and on the app. • An association code is generated. Enter it in your app.
Your Cookeo connects to WiFi using your phone: • From the home page of your appliance, go to "Settings", select "Connectivity and Account" then "Activate connection". • Follow the steps that will suggest you to download the app on your smartphone from the Google Play store or the App store. • From the app, create an account or log in then add the product you own. • Follow the different steps displayed successively on the product and on the app.
Wash the cut chips twice in a bowl of water before cooking to remove any excess starch. It is then essential to dry them thoroughly before cooking in a clean, absorbent tea towel and finally patted dry with kitchen paper. If you are cooking frozen chips you do not need to add any oil as these already contain oil and could make the chips soggy. If using the 2 in1 feature (bowl + tray) after the food is cooked on the tray, cook the chips for a further 2-5 minutes after you've removed the tray to make them crispier.
There are many possible reasons: • You may not have used the right variety of potatoes. • The potatoes were insufficiently washed and dried prior to cooking and still contain too much starch. • The chips are too thick. Cut the chips thinner. • You have not used enough oil. Increase the amount of oil. • The filter may be obstructed. Clean the filter. (ActiFry models only)
The size of the chip affects how crunchy or soft it is. The thinner the chips, the more crunchy they will be and conversely, thicker chips will be softer inside. Depending on your taste preferences, you may vary the cooking time and the cut of your chips: thin: 8 x 8 mm/Standard: 10 x 10 mm/Thick: 13 x 13 mm.
For best results, wash the whole potatoes and then sliced potatoes in plenty of water until it runs clear. This allows you to remove as much starch as possible to prevent the chips from sticking together. Dry them thoroughly using a dry, absorbent kitchen towel. The chips should be completely dry before cooking.
You can vary your pleasures and use different oils! Standard oils: olive, rapeseed*, grape seed, corn, peanut, sunflower, soybean* Flavoured oils: aromatic herbs, chilli, garlic, lemon... Special oils: hazelnut*, sesame*, safflower*, almond*, avocado*, argan*... We advise against using walnut oil, which results in a rancid taste after cooking. (* cooking oil according to manufacturer).
In general, we recommend using special chip potatoes. For new potatoes, which are rich in water, we recommend that you cook the chips for a few extra minutes.
The size of the chip affects how crispy or soft it is. The thinner the chips, the more crispy they will be and conversely, thicker chips will be softer inside. According to your wishes, you can vary how you cut your chips: • Thin: 8 x 8 mm • Standard: 10 x 10 mm • Thick: 13 x 13 mm
You can also prepare frozen chips. Since they are pre-cooked, it is not necessary to add oil.
With Fry Delight, you can prepare dozens of delicious recipes for snacks, dishes and desserts and vary your pleasures every day! • Meat: you can fry, grill or roast many types of meat in Fry Delight, whether chicken, beef, duck, etc. • Vegetables: Fry Delight also allows you to grill vegetables such as carrots, courgettes, tomatoes, etc. • Cakes/tarts/quiches: in Fry Delight, you can also cook cakes, tarts, quiches, or clafoutis by positioning the thermostat at the recommended temperature. • Frozen food: frozen meals or snacks can also be prepared in Fry Delight. It is recommended to preheat the appliance for 3 minutes before adding the ingredients. It is not necessary to defrost ingredients before preparing them in Fry Delight. • Crispy chicken nuggets with potato muffins, homemade chips with delicious skewered prawns, choose the dish you desire and follow the recipe with Fry Delight.
There is no danger in pulling out the basket during cooking, but it is not recommended. This will lower the temperature inside the device and, for "Smart" recipes, it may disrupt the cooking settings designed for optimal results.
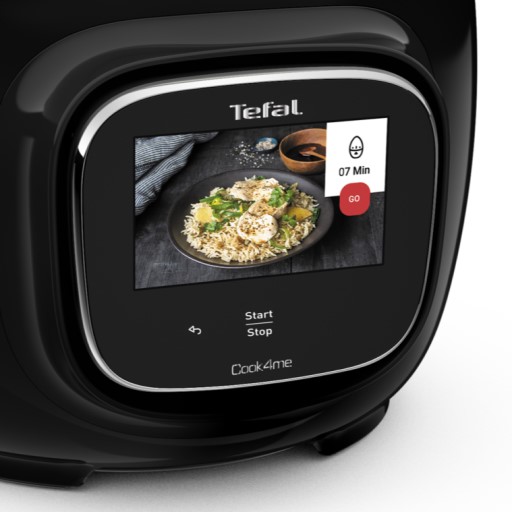
• Start/Stop button: touch the white spot at the bottom of the screen to turn on your device. • Touch screen: scroll the screen with your finger and select your feature. • Back key: once you have selected a feature, a back button will appear at the bottom left to return to the previous screen. It does not appear when you are on the home screen.
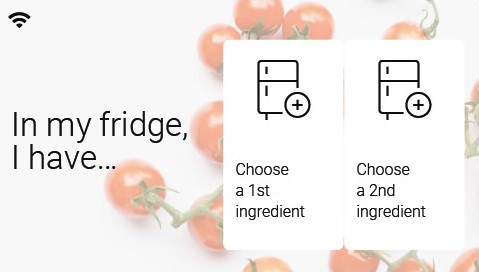
Thanks to the function "In my fridge" you can indicate the ingredients that you have at your disposal and we will suggest suitable recipes.
• You can access this feature from the home screen. • Add one or two ingredients by typing their name in the search bar and selecting it from the suggestions. • You can then enter the weight of the added ingredients so that we can offer you recipes for those quantities.
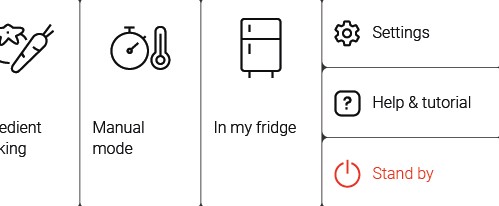
Access the home menu using the "Contextual Menu" touch button on the right side of the screen. This button also allows you to return to put your appliance on standby.
Thanks to the library, find the recipes integrated in your appliance. Thanks to the connection with your application, you'll have access to more recipes from the brand and the community!
• You can access the recipe library from the "Inspiration" menu. • Keep in mind that if you are not connected to the WiFi, you will only have access to the list of recipes integrated into your appliance. • When you are in the library, you can scroll through the recipes.
• You can find the recipe booklets that you created with the app. • You can access the recipe library from "My Universe". • Please note that if you are not connected to your user account, no recipe will appear. • You have to go through the app to add or remove recipes from your booklets.
The list of cookings by ingredients offers you cooking times and cooking modes adapted to the quantity you have at your disposal. There are 5 categories of food: Starches, Vegetables, Fishes, Meats and Eggs. You can access the ingredients cooking list from the home menu under "Cooking ingredients".
• Low temperature cooking is ideal for long cooking times, up to 12 hours, with the lid closed for a tender and very melting result. • Classic simmering is used with the lid open to thicken or reduce a sauce at the end of cooking.
• The "Sous vide immersion" mode cooks the vacuum-sealed ingredients and immersed in 3L of water. • The "Sous vide Eco" mode cooks the ingredients with only 5 cl of water using the steam basket.
• The "Gentle steam" mode is ideal for healthily cooking delicate ingredients such as fish and seafood. • The "Boost steam" mode is more suitable for meat or vegetables.
Clean the device with a damp, non-abrasive sponge and washing-up liquid. Do not use any aggressive cleaning agents, scouring sponges or abrasive pads. Do not use any special metal cleaning agents. Never immerse or run the appliance under water.
You have probably salted your food during the cooking process. Don't salt your food before the end of cooking to avoid scratching. For models using the tray, and to preserve its qualities for longer, do not use any metal utensils.
There could be several explanations: • The appliance is not properly plugged in. • You have not yet pushed the power button or you have pushed it incorrectly. Try again by pushing it firmly. • You have pushed the power button, but the appliance still does not work. Check that the lid is securely closed. • The engines are running but the appliance does not heat up. Take the appliance to an Authorised Service Centre to have it checked.
Your product is not connected to the WiFi (via the modem or via a mobile phone). Therefore, you can only access the 250 recipes contained in your product. We advise you to check that WiFi is activated on your modem/phone and to get closer to your modem/phone. We remind you that your product cannot connect to a 5GHz WiFi network, a WiFi network with a password containing special characters, as well as open WiFi networks (which do not require a password).
Your product is connected to the WiFi (via modem, mobile phone,...), but not connected to the database. Therefore, you can only access the 250 recipes contained in your product.
Your product is connected to the WiFi (via modem, mobile phone,...) and to the database. As a result, you can access more than 1,500 recipes.
1. Check that the appliance is not in standby mode by pressing the rotary knob. 2. Make sure that the power cable is connected to the power supply. 3. If the product is powered, unplug the power cord for 10 - 15 seconds and then plug it back in. If the problem persists, contact our customer service or take your appliance to an approved service centre.
To view the images, it is necessary to authorize the downloading of photos via a Wi-Fi connection. This validation takes place at the initial startup of the device. This setting can be changed in the "Settings" section of the Cookeo.
6 jars set (ref. XA606000): You can place 4 jars underneath and 2 jars on top. Be careful to place the two upper jars towards the front to prevent them from tipping over or hindering the lid from closing.
8 jars set (ref. XA6140E0): You can place the 8 jars with the 2 supports of 4 jars one on top of the other in the bowl.
Yes, this is a genuinely multi-purpose appliance, which can be used to cook a wide range of foods. Your appliance can be used for numerous recipes, from starters to desserts. You can also make crispy chips, tender chicken or even fruit cake…